
Adding custom domain on Heroku application : Everything you need to know


Table of contents


No headings in the article.
Here's the case: you have bought a domain from a domain registrar like Namecheap, Name, GoDaddy etc. and you have deployed a free heroku application. Now, all that's to be done is addition of custom domain on heroku app. These are the steps involved:
- Verification of heroku account
- Add custom domain on heroku
- Add the DNS targets in your domain's DNS records
Verification of heroku account:
You will have to add your debit/credit card details on Heroku to verify your account. You won't be charged anything for this.
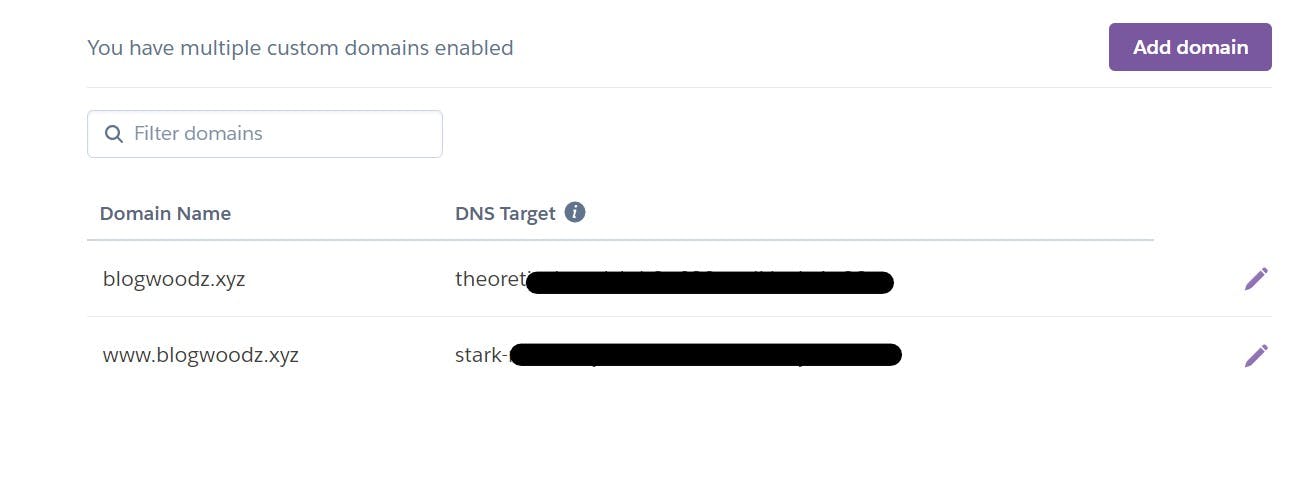
Addition of custom domain: On your Heroku dashboard, go to your app --> Settings --> Domains, click on Add domain. Add two domains, one with 'www' and one without 'www' . After you add your domain, you should see something like this:
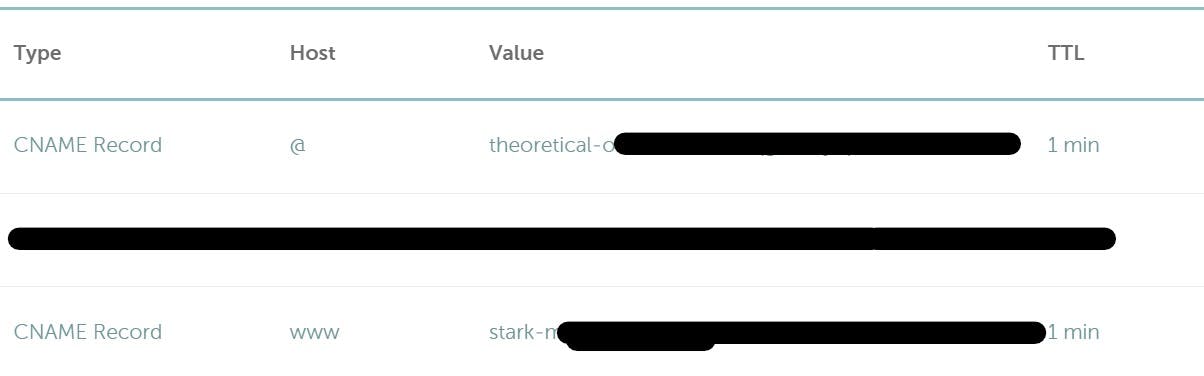
Add the DNS targets in your domain's DNS records: Go to your domain registrar, eg-: GoDaddy, Namecheap etc. , find an option like Manage DNS Records, and add two CNAME records. For the domain name with 'www', add the host name as 'www' in CNAME record, and for the one without 'www', add the host name as '@'. Your records should look something like this:
The records will take upto 30 min to propogate. After an hour or so, you will be able to view your site on yourdomain.com